Keeping the dough rolling and the sauce red... I got a plan!
I am ready, yes I am!
The summer plan is to start firing up my baby at least once a week! Yes, that's the goal. So many friends want to try my pizza, and I want them too so I need to get rolling here. The plan is to have a few people over at a time since I prefer to make my dough in small batches---mostly because I have a small mixer---but also because I want to keep it fun, I would hate for my "love" to become a chore. As you may know, sometimes the thing you love can become the thing you despise and I never want that to happen. One time in my life it did. I ate so much pizza in college, yes a lot of it was bad pizza, then after I graduated I could not eat pizza for almost two years. It took my mother's pizza to bring me back to my senses, now I am a happy pizza eater who preaches "Pizza is LOVE!"
Thursday, May 23, 2013

Monday, April 8, 2013
A Re-Posting.
I know a lot of you probably will not read my first post...so I am posting it again for a little background.
About two (plus) years ago I became obsessed with pizza. My love affair with pizza actually started as a child. My mother made homemade pizza most Fridays along with pasta fagiole. My maternal grandmother made lots of pizza in her basement kitchen on Catalina Avenue in Youngstown Ohio. She was known for her pizza a variety of what is called "Briar Hill Pizza" in Youngstown. Briar Hill Pizza uses grated Romano cheese instead of mozzarella.I do not make that kind of pizza, I go for the thin kind and the recipe I use is a variation of my mom's which I have to say I get a lot of compliments. I love pizza so much, that now I want to make pizza as they do in Naples. So I am building a wood fire oven by hand. This has been a process. Each step from the slab up requires me to do a lot of reading and preparing but even with that, it is not as perfect as I would like it to be. I am a producer for a TV station, I shoot, write and edit my own work. It is a job I love and do well. But I do not know too much about building things, so I take my time and do each step in my head. Now the slab is down, the plinth is built and the oven floor is laid, and I am building the form out of sand and thought this might be a good time to share my experiences.
OVEN DAY! January 1, 2013
I am late, I know... almost four months later and I am finally blogging about the awesome pizzas I made in my handmade clay oven--with the help of my pizza angels! The day was cold but Bob and Jody where there to help me get the oven up to 800 degrees and ah, the pizzas we made!
 The pizza took about 90 seconds! We made four!
 |
| I got a chainsaw for Christmas! That's Jody! |
 |
| The fire is getting hot---took a good hour! |
 |
| Bob got the fire going really well. |
 |
| This the finished pizza from above. |
 |
| Oh...my! The look on my friends' faces when they took their first bite will stay with me forever. The best feeling in the world! |
Briar Hill Pizza
I found this video on YouTube "Briar Hill Pizza" explaining "Briar Hill" pizza. It is worth checking out, though the interview is a little long. "Briar Hill" pizza is similar to the pizza my grandmother used to make, it's was created by the Italian immigrants that settled in Youngstown, Ohio in a section known as Briar Hill This is where my mom's family grew up---a small hillside facing a working steel mill. The pizza is still made today, and the local church, St. Anthony still sells the pizza on most Friday's mornings.
Wednesday, September 5, 2012
Finally! The Insulation Layer
Finally... I got the time and some decent weather--- not too hot but still a chance of rain---to put the insulation layer on the oven. And three friends came over to help too! Dave, Sherry and Sandy! I call them my pizza angels, but they are simply angels! Without their help, I would be building this oven till next year and then some.
 Sherry, me and Dave!


 Always handy is Kiko's book-- the bible of oven making! I cannot tell you how many times I read and reread this book!
I am enthralled by clay ovens!
Please send me your comments and links if you made one!
 This is the clay mixed with sawdust. I used cedar sawdust designed for hamster and other animal bedding. It expands when water is added--- we thought at first it was best to soak it but later we learned that was not a good idea. And proceeded with adding dry saw dust to the clay mixture (1 part clay to 2 parts sand).

 This looks like a monk's head!
The insulation layer was quick work since not a lot of time is spent packing it down down as the first layer--- and with friends it only took 2 and half hours. I plan to do a final "plaster" layer but first I need to get comfortable firing this up. I am so afraid of cracking it but I need to trust the universe...so to start... I will be doing 2-3 slow curing fires--- then a bread trial and then... the holy grail...PIZZA!


Truly though...there is joy in working in mud...with friends!


I am enthralled by clay ovens!
Please send me your comments and links if you made one!


The insulation layer was quick work since not a lot of time is spent packing it down down as the first layer--- and with friends it only took 2 and half hours. I plan to do a final "plaster" layer but first I need to get comfortable firing this up. I am so afraid of cracking it but I need to trust the universe...so to start... I will be doing 2-3 slow curing fires--- then a bread trial and then... the holy grail...PIZZA!
Sunday, July 8, 2012
Materials Review
I thought I would review some of the materials used to create the "mud" for my earth oven. I did not go out to find clay in the field but you certainly can, however I highly recommend if you do to read Kiko Denzer's book Build Your Own Earth Oven, he wrote a bit on how to test your materials before using. We are lucky in Pittsburgh to have a big wholesaler of ceramic supplies--- Standard Ceramic in Carnegie Pa--- there I got five bags of pure red clay (50 pound bag), mixed this one (clay) to two (sand), added water and mixed away--- see earlier posts.

The sand (50 lbs bag) I got at Home Depot, and I used builders or all-purpose sand as it is sharper and will hold better when making the void/form and mixing. I started with 15 bags of sand and five bags of clay. Now I have two bags of clay left and about 3 bags of sand. And I have the insulation layer and final layer to yet to do. I think I will be ok since the insulation layer has saw dust mixed into it. Oh, I got the saw dust from Trader Horn, cedar shavings actually, the kind used for hamster cages. I big bag set me back 10 bucks! I have more than I will probably use.
 Remember you are going to be making a sand form--- which took a lot of sand but after you make the clay dome and cut out your door--- you will excavate the the sand and use this for the other layers.


The sand (50 lbs bag) I got at Home Depot, and I used builders or all-purpose sand as it is sharper and will hold better when making the void/form and mixing. I started with 15 bags of sand and five bags of clay. Now I have two bags of clay left and about 3 bags of sand. And I have the insulation layer and final layer to yet to do. I think I will be ok since the insulation layer has saw dust mixed into it. Oh, I got the saw dust from Trader Horn, cedar shavings actually, the kind used for hamster cages. I big bag set me back 10 bucks! I have more than I will probably use.
 Remember you are going to be making a sand form--- which took a lot of sand but after you make the clay dome and cut out your door--- you will excavate the the sand and use this for the other layers.
  |
| The chimney is finished, I decided to go with one I built rather than the two halves of the terra cotta roof tiles I fashioned into a chimney. See an earlier posting. |


Thursday, July 5, 2012
Swish-Swish: Stomping the Clay!
Each day I try to work a little bit on the oven. The thing is that it has been hot, super hot and not good weather for this type of work, which is heavy and hard. Yesterday, I tried to finish the chimney area of the oven so I can get that insulation layer started. I was drench in sweat. In fact I think at one point I got a little too warm so I took a cold shower. Anyway as I stomped the clay mixture, my sweat was mixing in with the clay and sand. All it needed was my blood and tears. I just couldn't bring myself to cry or bleed.
I am hoping to complete this project soon because the list of people who want to have pizza straight out of a wood fire is growing. I think the fall is going to be full of party weekends, I might need to get a port-a-jane (john) or two.
Enjoy the pics:
I am hoping to complete this project soon because the list of people who want to have pizza straight out of a wood fire is growing. I think the fall is going to be full of party weekends, I might need to get a port-a-jane (john) or two.
Enjoy the pics:
 |
| Let's do the twist. I think I hear Chubby Checker! |
 |
| The clay I am using is powdered and very fine so to be safe I wear a mask. |
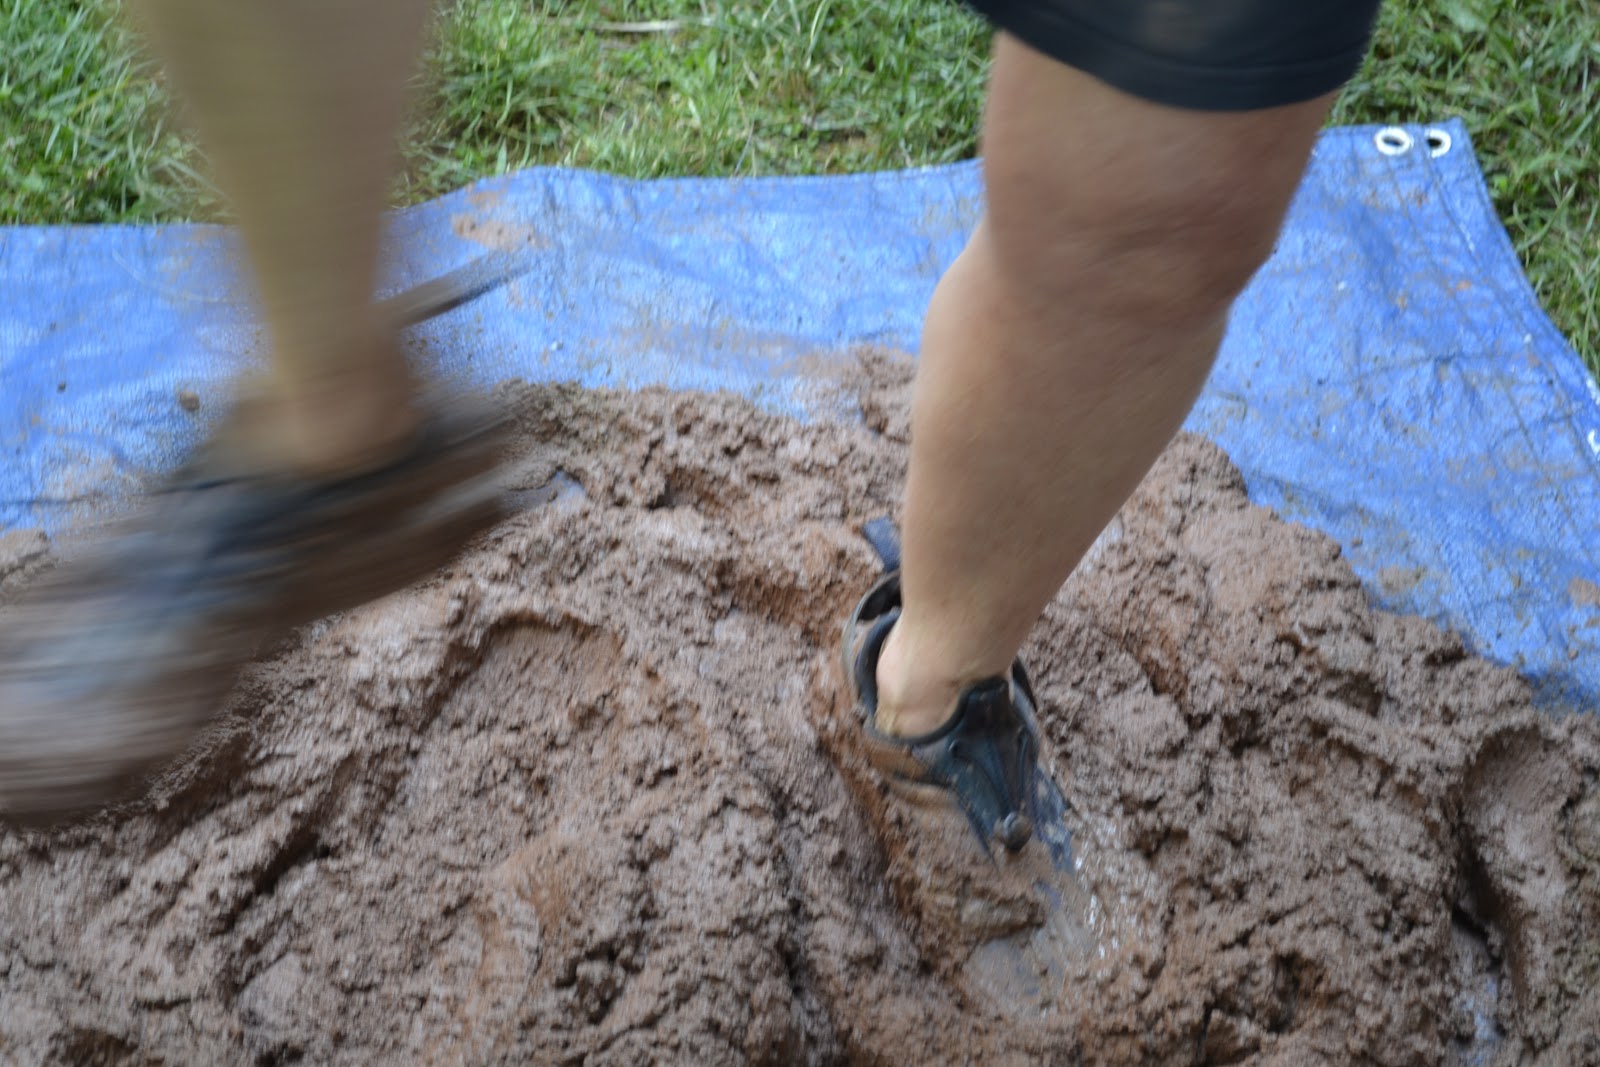 |
| Twist, twist, twist! |
Subscribe to:
Posts (Atom)